Author: Asenka Interactive

Guide for Managing & Getting Online Reviews

Customer service and help concept – business operator sitting at rustic wooden desk with six dices with contact and information symbols on them placed in a row.

When was the last time you did a search for your company? If the first page of google’s results are scattered with 1-3 star reviews of your company on various social sites, you may be losing potential customers. Often companies won’t hesitate to spend money on their website’s visibility, but fail to see the importance of managing their online reputation. While ranking high for relevant searches is key to being considered for future business, having poor rankings will erase any benefit you get from SEO. Follow this guide to make sure your business isn’t missing out from a poor online reputation.

1. Review Notifications

Determine which directories or social sites are valuable to your industry. If you aren’t sure, try a few different related searches and see what social sites comes up often. Moz put together a great guide on top citations by industry.  Once you have a list of the most important review sites, start claiming your listings or signing your company up if there is no listing.  You may want to use a different email than a primary address since you will get a lot of solicitations, but make sure it is one that you periodically check (at least once a month).  This will alert you to any new reviews your business gets in a timely manner.  If you get notified of a bad review, you will be able to respond quickly, and you can thank someone for a nice review as well.  If you are able to figure out who left the bad review, you can try contacting them directly to see if you can solve their problem, in hopes they will remove the review.  If that does not work, you can respond publicly in a professional manner, urging them to contact your customer service to resolve the issue.  This will make the company look responsive and considerate to their customer’s needs.

2. Don’t Fake or Buy Reviews

While it may be tempting to just create fake social profiles and write glowing reviews of your company, it is illegal and can result in hefty fines by the FTC.  This can also include deceptive reviews as detailed in the FTC’s review guidelines.  Examples would include an endorsement from an individual that did not disclose that they received some sort of financial or promotional incentive in return for the review, or if the reviewer has a bias towards the company (think family or friends).  The one area that is excluded would be if someone wrote a review about a product or service that a friend or family member received, and they could provide honest feedback (ex. My cousin got his floors refinished by XYZ company and they look great!).  There are also services such as fiverr that offer paid reviews, however these are against the terms of service of any website and will result in having the review taken down, or worse – your account banned.

3. Make It Easy

While it may seem like nowadays any product or service you purchase will bombard you for reviews, reaching out to recent customers is still the most effective way to get new reviews or bury old bad reviews.  The key is to stand out in your request and make it easy for the client to provide the feedback you are requesting.  Sending a personal email thanking the customer for their purchase and politely requesting a review will result in a lot more reviews then an automated message or text.  You can ask repeat customers that you have a personal relationship with if they would mind letting others know about their experience with your company.  Finally, create a webpage on your site or have some links in an email signature that make it easy for the potential reviewer to find your company’s listing in order to provide the review.  Asking “can you review my company?” will result in an email testimonial – which is nice, but not helpful for your online presence, similar to testimonials posted on your own website.

Now that you know the steps to getting online reviews and improving your company’s online reputation, go get some 5 star ratings!

My Website Got Hacked!

There is nothing more frustrating than to have your website hacked, especially if it’s happened more than once. Unfortunately, it is becoming more and more prevalent these days.

The first question our clients ask us is “why did my website get hacked?” Well, according to this report there are a few reasons: 1) access control 2) software vulnerabilities 3) 3rd party applications.

The next question is “how did it happen?” With regards to small businesses, we believe that your site getting hacked was unfortunately, just a coincidence. Something about your website might have been caught by the web crawlers. Or maybe it was a plugin that didn’t get updated, or your version of WordPress is out of date. I could go on and on.

That same report found “that it takes about 30 – 45 days for a new website, with no content or audience, to be identified and added to a bot crawler. Once added, the attacks commence immediately without any real rhyme or reason. It can be any type of website, the only commonality is that it is connected to the web.”

Targeted attacks or (DDoS) are usually reserved for the big boys (i.e. Saks Fifth Avenue, Chipotle, & BlueCross BlueShield) to name a few. These attacks are usually motivated by economic gain. Yup, it’s all about the money.

Alright, so now what do you do?

1) Get your site cleaned. Contact your hosting provider, or do a google search for malware removal service, or contact us. Site cleaning costs anywhere from $250-$500 and some companies will only guarantee that your site remains clean for 30 days.

2) Once your site is clean, check it here.

  • Change all of your passwords
  • Update your version of WordPress and all plugins
  • Add https to your site
  • Add a firewall

There is always the chance that your site can get hacked again, but with proper security measures in place, you can greatly reduce the risk.

How to Add a WordPress Profile Pic with Gravatar

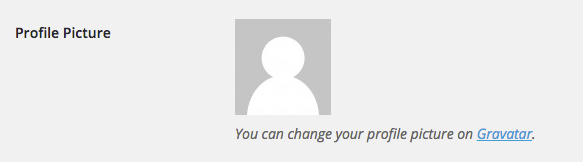
Ever see a WordPress blog post that includes the user’s profile pic with their name? If you would like to set up one for your account, it is easy to do with Gravatar through WordPress.com. Note, the email address you use for Gravatar will have to be the same email address assigned to your wordpress account for this to work, and the profile pic will appear on comments or posts on other sites that use Gravatar when logged in to your account.

Step 1. Log in to the backend of your wordpress site, navigate to Users, and find your account.

Step 2.  Under the profile pic, select the Gravatar link


Step 3.  Select Create Your Own Gravatar button


Step 4. Create an account with your wordpress user account email


Step 5. Activate your account through the confirmation email


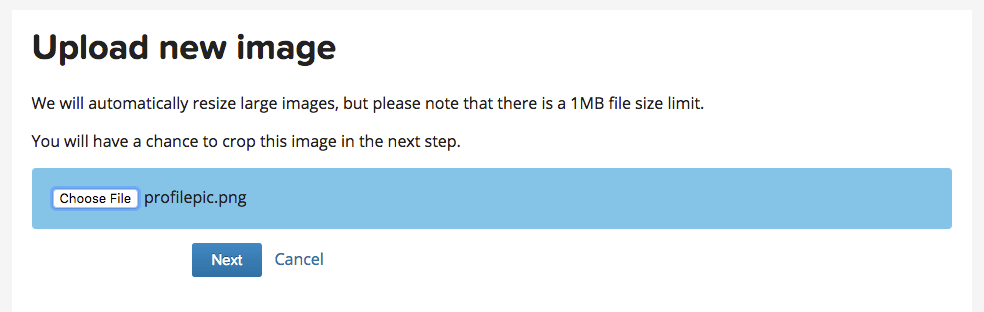
Step 6. Log in and select add a new image under the correct email address


Step 7. Find the picture you want to use as your profile pic, and crop to your liking.


Step 8. That’s it! Refresh your browser and log back in to your website dashboard, and you should now see your profile pic in your user profile.

How to Remove Duplicate Google Map Listings

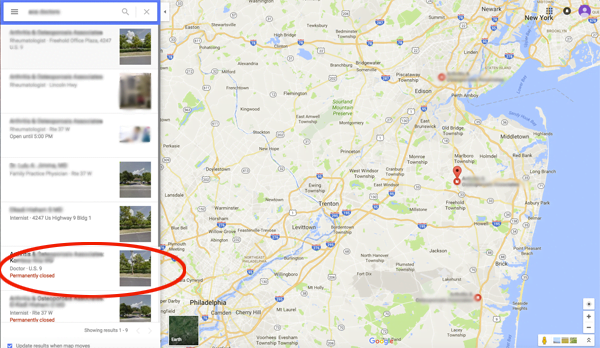
After a lot of research and hours on the phone with Google Maps support, hopefully this guide will help anyone that runs into the same situation with Google creating multiple map listings for one office location. Apparently this is a common problem for doctors and dentists as Google seems to want to give each individual their own listing, which is not only annoying to maintain but a headache if they no longer work there. Best practice also tells us we should only have one listing per location, so below are the steps to fix it.

    1.  In order for this guide to work for you, you must be using the same Google account that your current website is claimed in the google search console property, otherwise you will need to verify the listing with a phone call or postcard. screen-shot-2016-09-13-at-10-52-14-am
    2.  Go into Google Maps and find the listing you would like to delete.  In this example, the one has been marked permanently closed since it was an old doctor that no longer works there.
    3. Claim this business.  It should be instant verification if the website is claimed in your search console.screen-shot-2016-09-13-at-10-45-58-am
      screen-shot-2016-09-13-at-10-46-21-am
    4. Go to your google places dashboard, find the listing, and click Manage Location. screen-shot-2016-09-13-at-10-47-17-am
    5. If marked permanently closed, click Review and reopen the listing.  Then go into manage listing and click Submit at the bottom to verify all the information and to publish the listing.screen-shot-2016-09-13-at-10-47-44-am
    6.  Now go back into your google dashboard and find the now published listing.
      screen-shot-2016-09-13-at-10-48-33-am
    7.  Click Manage Location and find the menu in the top left, and then click Settings.
      screen-shot-2016-09-13-at-10-48-54-am
      screen-shot-2016-09-13-at-10-49-09-am
    8.  Scroll to the bottom and select Delete Page. screen-shot-2016-09-13-at-10-49-23-am
    9.  Google will make you log back in to your Google account, and then select all boxes and click Delete Account. screen-shot-2016-09-13-at-10-49-42-am

And that should be it! Give Google a day or two to update their map listings, and you should no longer see the duplicate listing in search results.